Showing posts with label DIY. Show all posts

Friday, June 7, 2013

Plain To Stained

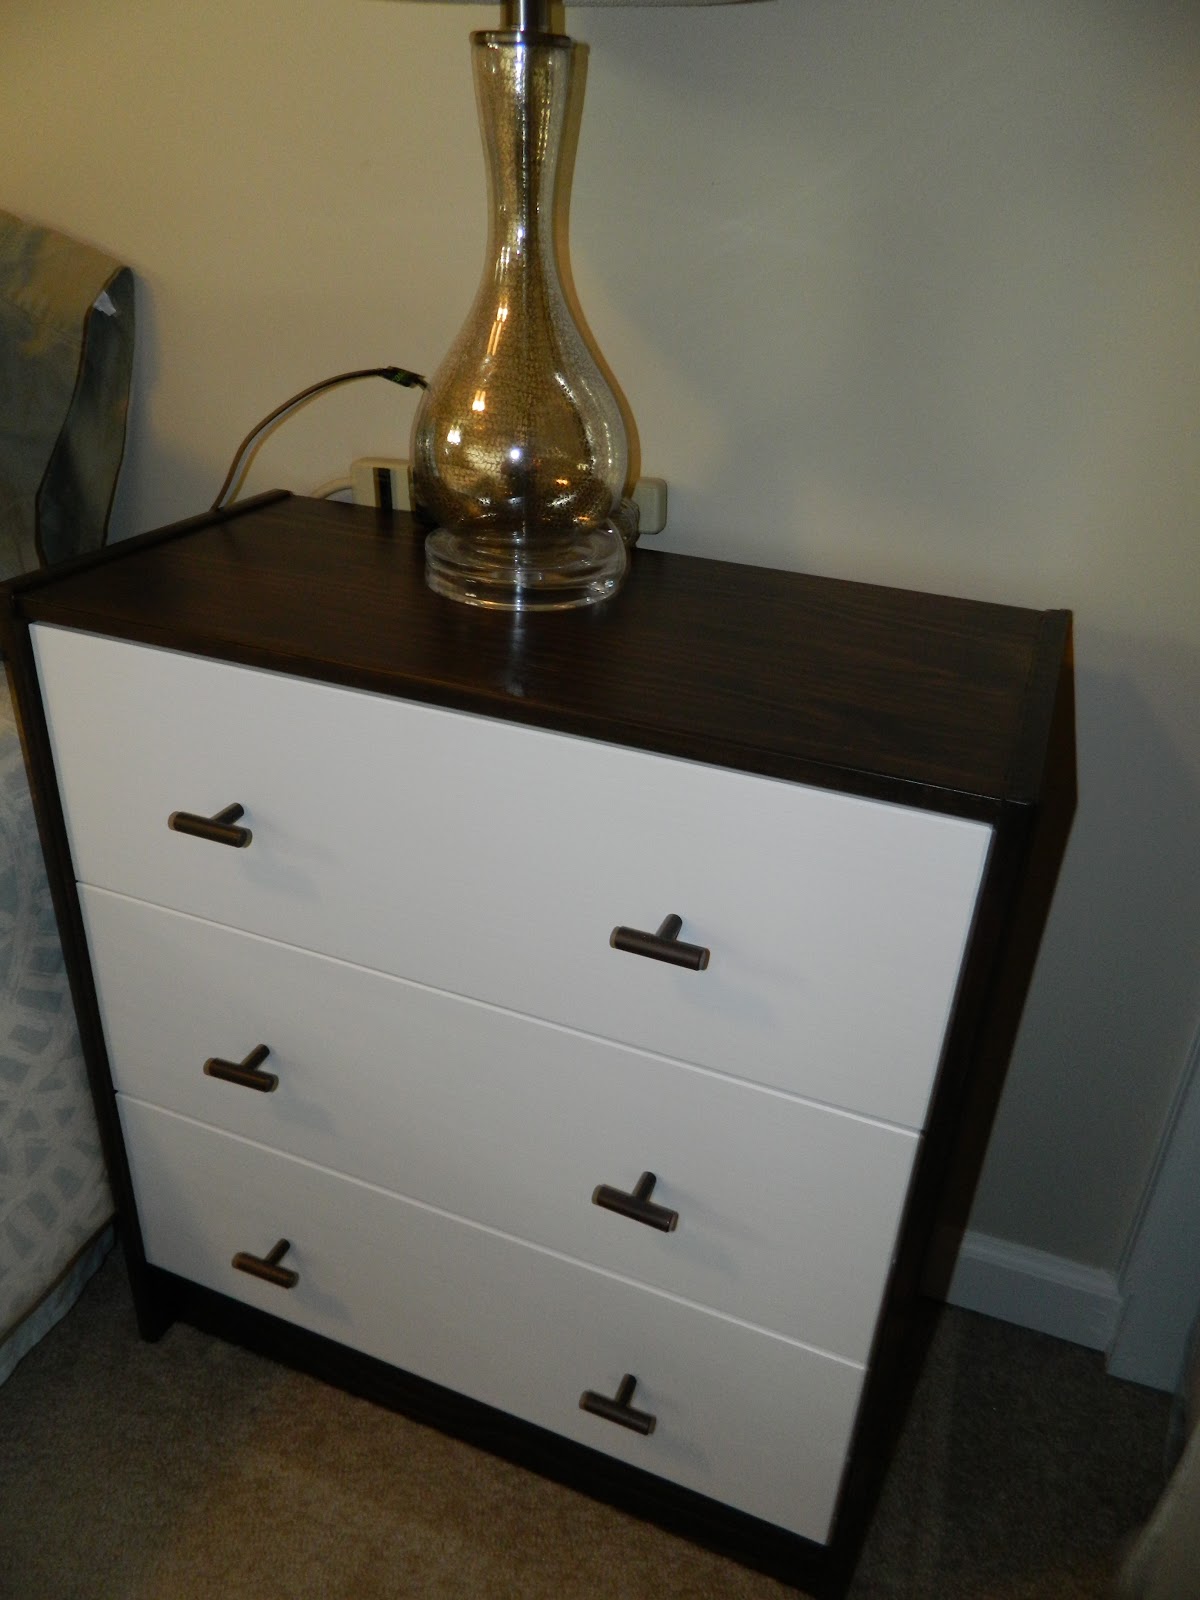
After living with unfinished night stands for nearly FIVE months... I can proudly cross these babies off the list. 

Remember when I was getting some 'rast' ideas back in January and settled on this beauty:


Source

I liked the sleek look of bronze, t-bar handles though. I did numerous searches in home improvement stores here for them and even tried to find something I liked just as much. Ultimately it was Amazon to the rescue and I scored these for $1.49 each!

I went to Lowe's on Sunday to get my supplies and felt terrified at the thought of staining something. I wanted a gel stain because I heard that was easy to use but the colors they had were all wrong. 

I ended up choosing the color 'kona' from Rustoleum. 

Source
I totally didn't need such a huge can of stain, polyurethane, and paint but I wasn't sure. I was so intimidated that I just didn't want to not have enough!

I think the total for the materials came to about $45 (it would have been less had I bought smaller cans but maybe I can use these on other projects!)


I sanded the pieces even though they felt smooth already. There were a few rough spots here and there.


After gritting my teeth and putting the first swipe of stain on, I had a mini-heart attack because it was SO DARK. It was almost black which was not what I wanted at all. Luckily Mom was right there because she told me to take my cloth and wipe it off some. After that, the color was perfect! I only ended up doing one coat but I think they looked awesome. 


I did three smooth, even coats on the drawers with the Olympic paint I bought. 


Over the next two days after work I coated my work in polyurethane liberally but not too thick. I wanted the finish to be smooth and really made sure I didn't have any spots running.

Today I came home and couldn't wait to put them in our room!


Ah! I'm in love. I think they turned out so great! I can confidently say that I've stained something now!


So much better than this!

Wednesday, May 8, 2013

Pinterest Challenge: Wreath Around With Rosies

It's a new season so you know what that means? 


I decided that my challenge project would be outdoor-related because it's been so nice out lately that I've noticed it could use some more sprucing out there besides some lawn mowing. 

Our front door has been rather bare and I've been pinning lots of wreath inspiration for a while now:

Source
Source
So, first I went to Michael's with my 40% off coupon and got these items:


Grapevine Wreath (regularly $4.99)- $2.99 w/ coupon
5 Felt Pieces - .29 each
Total: $4.86

Then I ran over to Joann's because I had another 40% off coupon for there and got these (except for the "C", that came from Hobby Lobby a while back for about $1.50!)


Wreath Hanger (regularly $2.99)- $1.79 w/ coupon
Premade Flower Embellishments (regularly $4.99)- $2.99 on sale
Total: $4.78

To make some lovely felt flowers I used the tutorials found on Pinterest here and here which were quite helpful.


I cut out simple leaves from the green felt and hot glue gunned them to the backs of the flowers. Then I laid out an arrangement of the flowers on the grapevine wreath and simply glued them. 


Love it! It definitely adds a little warmth to the front of the house even though no one ever uses the front door anyway. I also can't believe all it took was less than $10 and less than two hours. :)

Wednesday, April 10, 2013

Gimme Shade

So I guess that it's time for me to finally share my bathroom shade... I really didn't know how I'd write this up because it's not a tutorial and more like my trial and error of my bathroom shade. 

Here's what I made initially:


I decided where I wanted my hem on each side and made a pocket on the one side for the tension rod to slide through.


Then I used the Heat-n-Bond and ironed the edges for a crisp hem. It only took about five minutes to iron each side of the shade.


When I hung it up I knew immediately that this wasn't the shade look I wanted. 


I temporarily pinned the extra fabric until I got a look that I wanted and figured out how to go from there. 


So, how would I get to this shade look that I wanted? Well, I decided I'd take the finished piece and sew it up toward the pocket and make a loop. It also says on the Heat-n-Bond package to not sew through the tape. I decided to disregard this because I am a rebel and found out that it says that for a reason: it won't work at all. 


So, I abandoned that endeavor and worked on my second piece for my shade. I hemmed that all up like the first one so it was a finished piece and then: I just used sewing pins to pin the whole thing together! Sure, it's not a permanent fixture but no one is going to be touching it, you can't tell and it'll work!


I just pinned across the top near the tension rod...


And BOOM, done!


Sorry if this is confusing to follow, it was confusing for me too! It's really just my meandering thought process into figuring out this goofy shade. It only cost me a total of $9 for a yard of the fabric from Hobby Lobby and I owned the Heat-n-Bond and tension rod already. Still, even if you have to buy those supplies it's a cheap window treatment.

Tuesday, February 26, 2013

Pinterest Challenge Painted Pillows

Has it seemed like I've been distant lately? I'm sorry if it has felt like that but life is strange right now. We're facing down a year of sporadic deployments which are starting soon and I'm not sure how I'm going to deal with it since it will be our first long bit away from each other since we've been married. I'm thankful I'll have my mom, brother, and a house full of cats so it won't feel too lonely but it's still going to be an adjustment. 

I've been working on some projects though so hopefully I can get back to a more regular blogging schedule. 

Today I'm participating in the Pinterest Challenge that Young House Love and a few other bloggers are having on Wednesday.


I've seen lots of pillow DIYs on Pinterest and I've even painted curtains so I didn't think painting a pillow was too much of a stretch. I had some extra canvas from my drop cloth curtain project


For a while I had no idea what I would paint. I toyed with the idea of a monogram, a silhouette, a random pattern or design... I didn't know what.

So, I visited my "Our Rental" board on Pinterest and saw this cute sign that I had pinned.


Sign from Schoolhouse Electric & Supply Co., $20

I immediately knew that was it! I drew a stencil so I could place it on the pillow in the exact way I wanted and taped around it with masking tape. 


I used the same paint I had leftover from the painted curtain project- just regular old acrylic craft paint. 


I gave it two coats and peeled off the tape before it was dry very carefully to insure crisp, clean lines. 


With right sides together I sewed around the pillow and left an opening to turn it.


I then stuffed it and sewed the small opening... and bam! Done. It turned out so adorably! 


I think it looks great in our little dining room nook with my thrift store bench (that I bought for $9.99, I still can't believe it was that cheap!).